12/23/2019

Sisters of the Sun

Once in a while a song comes along that sounds more profound then perhaps it actually is. For me it's the way the lyrics have almost religious connotations. Or maybe it's the way the lyrics and melody flow together and stir up profound emotions. Bob Dylan songs do it for some people. I always thought Procol Harum's "A Whiter Shade of Pale" was so profound until years later I read the lyrics. Still a good song but the lyrics don't revel any greater truths.
The sun sets on another successful installation day.

Let's go back to July 1972 for the release of Jackson Browne's debut album, Saturate Before Using.  His single from that album, "Rock Me On The Water" has always seemed like an important, like important to mankind, type of song.

These lyrics have even more meaning given the many crises facing the world today:
Oh people, look around you
The signs are everywhere
You've left it for somebody other than you
To be the one to care
You're lost inside your houses
There's no time to find you now
Your walls are burning and your towers are turning
I'm going to leave you here and try to get down to the sea somehow
In "Rock Me On The Water", Browne sings about the healing properties of water.  Water is necessary to life that's why I installed a 21 gallon fresh water tank, a sink and toilet in my new camper.

In my previous post, What a Difference a Week Makes, I had installed a front and back wall and roughed in the toilet and bed. I learned the water tank wouldn't fit underneath as I had originally planned so it had to go under the bed.  During this phase, I got sidetracked from my plumbing work to deal with water in a different way, a diabolical rainwater leak!

Since getting the trailer in June there have been no water leaks. So, it was puzzling to come out one morning in November after a nighttime rain storm to find water on the floor, just inside the door.  I really hate water leaks in homes, cars, campers, or anywhere.  They are difficult to troubleshoot and difficult to repair. Water is hard to tame. Many times it's present where you don't want it and missing where you'd like it to be.

I dried it up. Luckily there was little damage to the floor. I suspected the leak was coming from a seam in the exterior aluminum skin where one section laps over the next.  I got the hose and squirted that seam. That was where the leak was coming from. To try and seal it I used silicone caulk, the same stuff I used for the windows, on the inside wall. After letting it dry overnight I hit it with the hose again. Damn. Still leaking.

Let this be a lesson to all you folks who think you can solve water leaks with half-measures. Yes, you've got to go all the way. I took all the screws out of the seam on the exterior and slipped a Popsicle stick between the two aluminum layers. That gave me just enough room to stick the nose of my caulk tube between the layers and like a madman I pumped that gap full like it was a jelly doughnut. I put the screws back in and coated the outside of the seam with silicone. Then I gooped the inside wall with that stuff from top to bottom. I let it dry for 24 hours. The repair is ugly as sin but it doesn't leak anymore. Form follows function, bitches.
As always, click any photo for an easier-to-see version

The back wall was nice and cozy but I missed the sunlight I got with the back door down.  It was isolating. I thought it would be best to have a small window that would let light in and allow a person to pass a beer or other needed item between the main cabin and the back porch. Even the cheapest home window was $100. I found a 14" wide by 21" high window designed for sheds or playhouses for $37.  It fits well, it's well built and was easy to install. Problem solved!

As I talked about in my post, Camper or Trailer, I'm a little uptight when it comes to cutting holes in the trailer that go all the way through from outside to inside because every hole is a potential water leak. I'm slowly learning to overcome my fears. I needed a way to get fresh water from the outside to the water tank inside. I punched a hole through the left side in the rear storage area; installed a new gravity fill water inlet and ran the pipe through the back wall and hooked it up to the water tank.

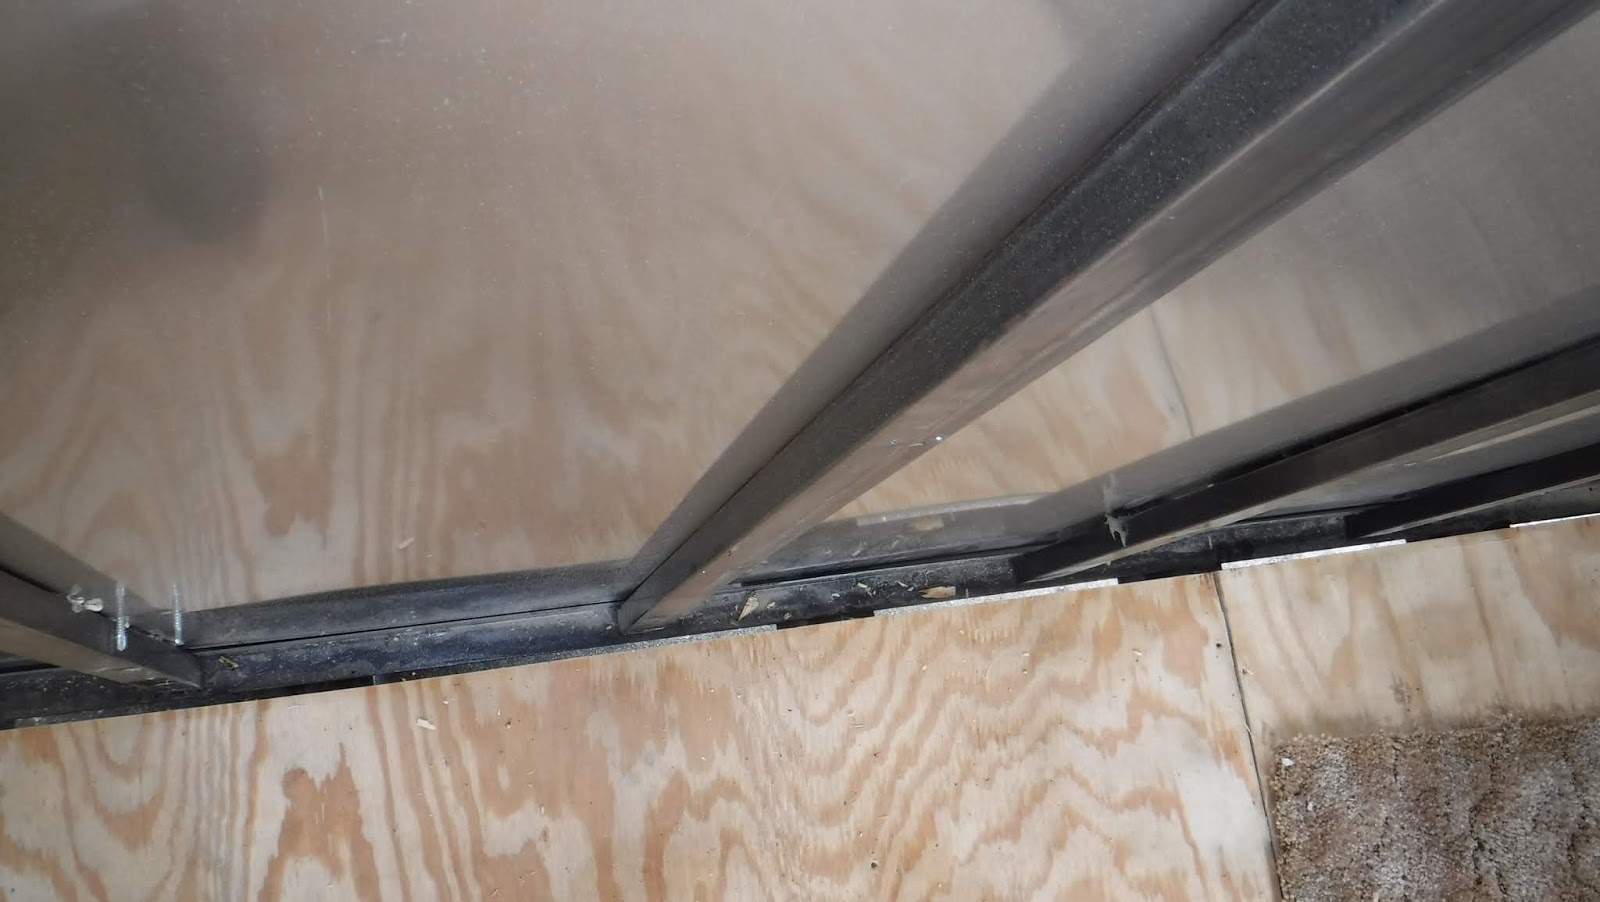
I ran clear 1/2 inch hose from the tank, through the floor, under the trailer and along the frame. Then I punched it back up through the floor near the sink area. That's where I mounted my water pump. After the pump I have a splitter that takes one water hose to the sink and another through the front wall to the toilet.

I'm going to borrow a term used in boat building and refer to my kitchen area as a galley, although it's not much more them a large cabinet that houses my sink, refrigerator, microwave with countertop space for a small, 2-burner propane stove. I framed in my galley which is 60" long by 22" wide. I used some plywood leftover from the bed area of the popup for the countertop. I covered that with leftover Formica from our kitchen remodel.  I'm using a 7 gallon water container to catch the grey water from the sink. It's held in by a bungee cord and can be removed and emptied by hand.  The office-sized refrigerator was also scavenged from the popup. The guy I bought the popup from said it was brand new and it looks it. There's space on the left for an under-counter microwave, perhaps mounted on a sliding shelf.


Getting electricity from the galley to the power center (one side of the camper to the other) looked to be a real challenge.  It's next to impossible to route the wires over the ceiling. I needed to get wires for my 12 volt water pump, two 110 leads and a fat, 30 amp shore power cable from on side to the other. The best, quickest, path was to go under the floor. I used a 1.5 inch electrical conduit and two 90 degree elbows.  My anxiety level cranked up to 11 again when I installed an exterior 30 amp shore power receptacle. 


My original plan was to house all my electrical system components under the couch. I'm calling that the power center.  The available space tuned out to be much smaller then I had hoped for. It's more the size of a loveseat rather then a couch.  The main loveseat/power center tuned out to be about 25 inches wide by 54 inches long. Still large enough to house all the components - 110 breaker box, 12 volt fuse panel, 2-100 amp hour deep cycle AGM batteries and a 12 volt to 110 volt inverter.

I've come a long way toward having fully functioning power and water systems.  In my next dispatch I'll install the critical electrical components and start testing the systems.  I mean, when you have fully functioning water and power it's not just a trailer.  After that you gotta call it a camper, right?


NEXT POST: Bringing It All Back Home


Enjoy Linda Ronstadt's version of Rock Me On The Water, of course.


https://genius.com/Jackson-browne-rock-me-on-the-water-lyrics

https://youtu.be/yAXl4kYZyoA

https://youtu.be/h7DqRwo5qxI

https://en.wikipedia.org/wiki/Rock_Me_on_the_Water

11/18/2019

What a Difference a Week Makes


In October 1974 The Rolling Stones released their 14th American studio album, "It's Only Rock and Roll". The album blended rock-blues with elements of reggae and funk.  Five years later I installed one of the first auto-reversing cassette players in my car. I listened to It's Only Rock and Roll without ejecting and turning over the cassette. One of the songs I was listening to on an endless loop was a slow, dreamy song that was somewhat out of character for the rough and tumble, early-1970's Stones: Time Waits for No One.

Yes, star crossed in pleasure the stream flows on by
Yes, as we're sated in leisure, we watch it fly ...
Drink in your summer, gather your corn
The dreams of the night time will vanish by dawn 

My neighbors stopped by to check on my progress.
Looking back at all the camper work I DIDN'T accomplish during my week off work, I'm painfully reminded that time waits for no one.

In my last post, Trailer or Camper,  I was doing a celebration dance because I achieved a significant milestone by installing all the windows.  After installing all the windows I put all the plywood back up on the interior walls and moved on to the next phase.

Prior to installing the windows I had built a couple of walls but had not installed them.  One wall to separate the front "V-nose" section from the main cabin and the other to wall off a 2 foot area in the back.  The front area houses the toilet and a closet. The back is both for storage and to protect the occupants from the highly-loaded spring that makes the back door easy to open and close.
All in all it's just a back wall.
That coiled spring holds a lot of energy and if it breaks someone could be seriously hurt by flying metal debris. I built the walls at the shop and brought them in the trailer through the back door.  On my first attempt the walls were too wide and had to be disassembled and narrowed about a half inch. 

You might remember from my earlier post, One Thing Leads To Another, I was having trouble finding a place to put the toilet that would be clear of the boxed-steel frame.  The toilet requires 11 inches of clearance on all sides. I didn't have any of the interior walls in so it was difficult to get an exact measurement. Once I got the plywood back up and the front wall in, I was fairly certain of the
NONONO. Don't. It's not hooked up yet.
placement. I did a lot of looking underneath, then looking inside. Like 50 times.

The toilet mounting hardware is about 6 inches around and is made of black ABS plastic. You cut a 4 inch hole in the floor and screw it down. The item that connects to the sewer hose is also ABS. So you need a piece of PVC to join those two together.  A special type of  ABS to PVC transition cement is required to join ABS to PVC. And Holy Toledo. My toilet fits perfectly.

My old pop-up had a 17 gallon fresh water tank I thought I could use in the new trailer.  I removed it and found it was strangely shaped. It was custom-made for the shape of the pop-up. Flat and wide with a small area that went over the axle. It wouldn't be a good fit for the new camper. I bought a new 21
Bed frame, water tank, back wall
gallon tank and had planned on mounting it underneath the floor in front of the axle.

When I tried to place it, it was too big to fit without notching out one of the floor braces. I did not want to compromise the structure of the floor so I found a place inside, under the bed to put it.

I found an hour to also install a couple of smaller features. A folding handrail next to the entrance and an exterior AC outlet.

Now, I'm rushing to get all the infrastructure in and working. Fresh water tank. Plumbing, sink and toilet. Power inverter, batteries, 110V and 12V outlets and lights.

The folding handrail is a nice touch.
NEXT POST: Sisters Of The Sun


11/04/2019

Trailer or Camper

Almost 54 years ago, on January 22, 1966 the British rock group The Hollies had their first American top 40 hit. "Look Through Any Window" peaked at number 32 on Billboard magazine's top 100 list. The song featured Tony Hick's finger-picking 12 string guitar, Bobby Elliot's driving drumbeat, and the Hollies signature three-part vocal harmonies.

Don't listen too closely to the lyrics or you'll realize the song is encouraging a light-hearted but creepy voyeurism. I've installed all the windows in my trailer-to-camper conversion project. Don't expect to look through them and see "the little ladies in their gowns" as the curtains will be drawn.

In my last post, One Thing Leads to Another, I described the dilemma of requiring one part to be done before another could be started.  Now it seems like everything is moving at a much faster pace and the project is tumbling forward.  Which is good because I only have roughly 12 more weekends before this camper has to be ready for our trip to the Sebring 12-hour race.

As you can imagine, paying $4000 for a water tight trailer and then using a saber saw to cut big holes in the walls can cause a person to stop and think.  But I forged ahead with courage.

When I was a wee-lad of 19 I had a job at an automotive accessories store. I installed car stereos, speakers, alarms, amplifiers and much more.  One of the items I learned to install was sunroofs. These were cheap windows that popped-up to allow air in or you could remove the glass altogether. So the concept of cutting a big hole in metal was not completely foreign to me.

At this point there's no turning back.
As usual, click on the pictures for a larger version.

These windows required the removal of a couple of the steel ribs in the walls. My first instinct was to weld in some steel to restore the structural integrity. I decided it would be easier and just as strong to use a half-inch thick piece of plywood in the window opening. It would take up the gap between the inner and outer walls. The plywood would provide enough support, especially when the inner walls were reinstalled.

Inside looking out
It's hard to see but I cut the steel beams to create tabs. I peened the tabs back over the plywood and screwed them down to help restore some of the structural integrity to the wall.

I cut a small channel in the wood to allow that wire to go past the window without pinching it. The 36" X 24" windows didn't require butyl rubber sealant. They came with a rubber seal already in place around the window perimeter. I did follow up with a bead of silicone around the outside to be sure no water leaks will occur.

I installed a 12" X 12" window in the door.   99% of camping situations are very safe. But it just seems like a good idea to be able to see who is outside the door before opening it. The door window went in so easy.  It only took about 40 minutes from start to finish.
Looking very camper-like.
  
On the left side I wanted a smaller window over the sink. It's nice to be able to look outside while working in the kitchen.

The windows with the trim rings and interior walls installed.
I was pretty uptight about making a mistake. I went very slow and, surprisingly, I didn't make any mistakes on any of the windows. All the windows slide open and have screens.

So now is it a camper or a trailer? I've been having an internal debate about when to declare this project has crossed over from cargo trailer to camper.  At first I thought when the windows are installed the trailer will become a camper. Now I'm not so sure. Right now it's not really fit to camp in. Oh sure, you could throw a sleeping bag and a container of water in it and take it to the woods.   But that's not in the spirit of creating a comfortable home on wheels.

So, I'm moving the goal posts. For the time being, it's still just a trailer with windows. I'm not formally calling it a camper until the infrastructure (the plumbing and electrical systems) and the bed is installed. Until it can be taken out and camped in, it's not a camper.  Informally, I'll start referring to it less as a trailer and more as a camper.

So I've scheduled a week off work and plan on devoting the entire week to trailer work. I've got to get my plumbing and electrical in and to do that I've got to install the walls, bed, galley and loveseat.

NEXT POST: What a Difference a Week Makes

9/27/2019

One Thing Leads to Another


From England, The Fixx and their song One Thing Leads to Another reached #4 on the Billboard Hot 100 chart in November of 1983. Who remembers Reach the Beach? For this camper build, it's probably more accurate to say one thing depends on another.

It's been more then 2 months since my last update on the cargo trailer-to-camper conversion.  Summer work puts a pinch on project-time fun. Here in sunny Florida, daily monsoon-like rains and nearly 14 hours of sunlight every day means the grass is growing 24-7. I'm mowing acres of grass every weekend ... all weekend. Respite comes at the end of September when the reduced sunlight cues the grass to slow down and then stop growing for the year.

In my last post I was astounded at the gaps where the floor is supposed to meet the walls.

To fix that I moved the existing flooring over and used some old OSB to fill the gaps. I caulked every gap I could and used spray foam insulation to fill the larger gaps.  Rather then entertain you with my witty narrative, I'll just show some pictures of my recent progress. As always, clicky on the image to see a larger version.

Running both the 110v and 12v wiring. This reminds me of my old car stereo days.
I'm used to doing this with wood studs in a home, not a metal structure.
I hope this is enough. It's going to be difficult to add a circuit after the walls go up.

I'm using some 3/4 inch coated Styrofoam. Looking back to front.
Insulation looking front to back.
I ran 12v for my ceiling lights but haven't insulated yet.
I'm struggling with finding a location for the toilet that is clear of the boxed steel floor supports.

When I say one thing depends on another, this is what I mean.
  • To install the windows I have to put the plywood back on the walls.
  • To put the plywood back up I have to run my 110, 12v wiring and install the insulation.
  • To run the wiring I had to decide where the power center -- batteries, inverter and breaker boxes would go.
  • To decide where the power center would be and run my wires I had to plan my electrical system. 
  • To know the exact placement of the windows I had to rough frame in the back wall and the bed.
  • Before putting up the back wall I had to frame in the front wall and the toilet/closet.
My first thoughts were that I'd work this conversion from back to front but it's turned out to be front to back. What I have now is a number of sections in the beginning stage and nothing complete.

I have 2- 24" X 36" windows to go on each side of the main living area. I have one 24" X 16" window to go above the galley and one 12" X 12" to go in the door. I created a window template and have marked to install my two largest windows.  Now I must screw on some bravery, get out the jigsaw, and cut huge holes in the side of my beautiful trailer.

I said that I'm calling it a trailer until the windows are in. After that, it becomes a camper.  Don't miss my next dispatch when we learn if it's a dream or a dud.

NEXT POST: Camper or Trailer 

7/08/2019

Begin at the Beginning

Prior to getting the trailer, I had sketched out some rough floor plans using a computer graphics program.  So I had some vague notions about what I wanted and how to arrange it.

These didn't come with numbers
As soon as I could, I got into the trailer with a tape measure and a roll of blue painter's tape and started laying out the floor plan. I knew I wanted the bathroom in the front where the V-nose is.  And I knew I wanted some storage at the tail by the ramp door.  Everything else would go in between (somehow). I thought if I started at the back and worked my way forward, I would know how much room was left over at the front for the bathroom. I was going to start by installing the windows.

One of the wonderful things about a project like this is you never know what is around the next corner or where the journey will take you.

During my first weekend of work it became clear that a lot of other tasks will have to come before the windows. Some of the tasks will have to occur, not in steps, but simultaneously. I started by removing the interior walls. Here's where I was actually thankful they didn't do as complete of a job as possible.

First came the trim. 1/4 inch plywood strips about 5 inches wide and a few feet long.  Stapled in with 1 inch staples. Not easy to remove without damage. I used a putty knife to get behind it and gently pry it off. Then came the wall panels.  

The "Bones" of the trailer
They used 1/4 inch plywood. The goal was to remove the panels as gently as possible and reuse it. The factory used a few regular Phillips screws. But around the edges they used a strange 1 1/2 inch screw-shank nail that had a Phillips head. Oh, no. It's not a screw. Don't even try to remove it with a screwdriver. They shoot these through the plywood and into the steel wall beams. They must use a special gun and put them in to stay forever. With much care, a variety of tools and gentle prying along with some targeted violent action I got all the inside walls off with minimal damage to the wood.

You might remember in a previous post how I praised the manufacturer for doing such a good job.  Yeah, forget that.

The floors are 3/4 inch plywood. Very sturdy and installed with plenty of  (regular Phillips) screws. They failed to run the plywood all the way to each wall which left a gap on one side. The gap is artfully hidden when the walls are installed. It's a gap that lets you see the road below!  Now, I understand these trailers are built for landscapers and for moving cargo. But that huge gap is sure to eventually let water get inside the trailer. No matter what you use your
I see London, I see France...
trailer for, that poor attention to detail should cause alarm.

The best solution I could come up with was to remove the floor panels, notch them out to allow for the wall beams and move them over. That exposed a 2 1/2 inch gap on one side that I'll patch with additional OSB I already have. In a few places the outer aluminum skin is not fully against the wall beams which leaves a 1/4 inch gap. I'll be getting one of those cans of spray foam insulation to fully seal the inside from the outside. 


Up next:
Complete floor repair
Spray foam all cracks
Install both 110 and 12 volt electrical wiring
Insulation

With the walls off I painted the exposed steel wall studs. I used up 4 cans of half-full spray paint I had laying around.  Glad I save all that old stuff!  I did order windows but those are a weekend or two away from installation.

Feels good to be underway. Cheers!

NEXT POST: One Thing Leads to Another

6/27/2019

The Baby Came Early

Our new bundle of joy arrived on Saturday June, 22. Earlier then expected. And what a beautiful baby it is.

I have read some stories and seen videos about the poor build quality of cargo trailers and a couple of stories about poor Diamond Cargo builds.  I have inspected this new trailer from top to bottom. This is a super high-quality built cargo trailer from Diamond Cargo. All the exterior screws
are perfectly lined up. Straight to the middle of the steel frame. The same with the interior. All screws are in straight and true.  All the lights are working. The interior is 7' 3" which puts the overall height at a whopping 9 feet. The extended tongue leaves plenty of room for LP tanks. The thicker aluminum skin in silver color is so beautiful, it's stunning. Imagine an Airstream but built even more like a tank.

I added a special request in the comments section of the order. I told them this was going to be an RV and to take special care with the build quality.  I didn't expect for my request to be read or followed but I was hoping.  I don't know if they did take special care with mine or if they are all done this well but I am so impressed with the attention, care and quality on this cargo trailer. Well done Diamond Cargo.

I have been kicking around a few ideas for the layout but it was difficult to visualize them. The build considerations stem out of conversations the wife and I had after our 2019 Sebring trip. Some of the most important features we want are:
  • Comfortable beds
  • Quiet cabin
  • More room
Otherwise we were pretty happy with the features of the popup. Popup features we will build into the new RV:
  • Indoor/Outdoor cooking
  • 17 gallons of onboard water
  • Awning
  • Dual propane tanks
  • Sink
Now we are including new features in the cargo trailer like:
  • Cargo ramp to be a back porch
  • Grey water tank
  • Toilet
  • Couch
  • Galley
With the trailer here now, the planning begins in earnest.


NEXT POST: Begin at the Beginning

6/26/2019

Where to Buy?

After deciding on a 7' by 14' tandem axle trailer the question was: Where to buy one?  Well, because I'm "Mr. Cheap" the first place I turned to was Craigslist. After a few weeks of looking it became clear that it was damn-near impossible to find a good used trailer in the size we wanted on Craigslist. When I did find one it was beaten up. No matter the condition, Craigslist trailers were going for the same price as, or a few hundred dollars less than, a brand new one.

New trailers do not cost that much. Retail trailer sales lots in our area did have the size I wanted at a decent price but you have to be satisfied with the stock, plain-Jane white trailer. All of them are 6'3" inches in height. It wanted a trailer with some additional headroom.

After looking at a lot of the trailers online the wife and I went to a local lot to look at some cargo trailers in person. We looked at a 6' x 12' and a 7' X 14. They had a "cheap, bare-bones line" that had a thin outside skin, OSB interior walls and steel frame ribs at 24" on center. And they had an upgraded line that had a little thicker outside skin, plywood interior walls and frame ribs at 16" on center. There were a few more minor differences. It was helpful to see one in real life, take some measurements and see the quality of construction.  We were already nearly decided to custom order a trailer but it was good to go see some in real life.

It became clear that ordering a new one would have many advantages. You can get the size, color and other features you want.

I started researching online trailer sales. Every online trailer sales company seemed to offer the exact same package. After a couple of weeks it became clear that almost all trailers that are sold east of the Mississippi are made in Georgia.  It doesn't matter who you buy them from they are all made in the same place.

I found Diamond Cargo Trailers online. They offered an online configurator that you can go through and check off the type of trailer and the features you want. You can place your order quickly and easily. I did call the sales department to ask a couple of questions which they answered quickly.  They confirmed they can deliver the trailer right to my house.

On June 4th I placed my order.  We ordered a 7' X 14', with an additional 12 inches of height, an extended 60" tongue, and a thicker .030" outer aluminum skin in silver. I forgot to ask how long it takes but I've heard about four weeks. Now we wait.

NEXT POST: The Baby Came Early

6/25/2019

Search and Research

After Sebring 2019, I immediately started looking for another travel trailer to replace the pop-up. They all looked so cheaply built. And I kept finding something wrong with the designs that wouldn't meet the needs of my wife and I. Mostly problems with the bed layout. Many of the beds are positioned horizontally in the back. If one needs to get up in the night, as I often do, I'll have to somehow climb over my partner to get out of bed. As you can imagine, now both partners are awake and not getting quality sleep.  At our age, we really require separate beds.

The wife commented that the interior look and feel of the mass-produced RVs reminded her of an extended stay motel. I agree. The internet is filled with stories and videos from folks who are constantly repairing their RVs or who have a brand new RV with multiple problems. Although I'm capable of doing repairs, I would prefer to spend my time camping instead of making repairs.

That's when I stumbled on videos of people who took an enclosed cargo trailer and converted them into RV campers. I was elated! I spent the next week, hours and hours, watching all the videos I could find. I was fascinated with the endless design ideas. The challenge of designing and building my own camper was super appealing. I didn't have to settle for poor build quality and a cookie-cutter design from an unknown guy in Indiana.

I thought this was the best idea I'd ever seen.  A trailer with a steel frame and aluminum exterior is so much more robust then any mass produced, wood-framed travel trailer.  And the building my own RV would be a real test of all my skills. Welding, carpentry, plumbing, electrical and others. That's when I decided to get a cargo trailer.  So, I did some research.

1999 Ford F-150
We wanted to get the largest trailer we could safely pull with our truck.  First I tried to learn how much weight our truck can pull. I was thinking the most we could safely pull would be a 6' by 12' single axle trailer at around 1200 pounds. We have a 1999 Ford F-150. It's got a 4.6L V-8, automatic transmission and 3.55:1 differential. Then I looked at this chart which told me my maximum loaded trailer weight is 6,900 pounds. Knowing this opened up some other possibilities. For my camper, I didn't want to come anywhere near the maximum allowed weight. It's an old truck with 300-thousand miles on it.

I stumbled upon a guys website who estimated his 6' X 12' cargo trailer build added between 1000 and 1500 pounds to the weight of the trailer.  I don't have any other documentation on how much weight the build adds but that just sounds about right. A 7' x 14' tandem axle trailer weighs around 2200 pounds. Add 1500 to that and you're coming in at 3700 pounds.  Adding additional height and an extended tongue adds a few hundred pounds. Fresh water weighs 8.3 pounds per gallon so 20 gallons would be 166 pounds. When you go camping you also bring a generator, food, other gear, and passengers that can be up to 800 additional pounds. All told we are still at around 4900-5000 pounds. Well under the 6,900-pound limit.  That's when I decided that the 7' X 14' tandem axle was the one to get.


NEXT POST: Where To Buy?


6/20/2019

The Birth of a Project

I have always loved camping. I used to camp a lot when I was younger. As a kid growing up in Ohio in the summer the neighborhood kids and me would pitch a tent in the backyard.

In high school, some good friends of mine were avid campers and backpackers so I got into it too. We lived in a suburb that was within walking distance from some great rural camping spots. Our philosophy was to be as prepared and self-sufficient as possible. Also to be innovative and creative with your camping gear. We camped under a railroad trestle. We camped in an abandoned barn. We camped in wooded areas. There are reclaimed strip mining areas, tuned back into parks, where we camped.

But I haven't camped that much since I moved to Florida. Part of the reason is Florida is a horrible place to go camping. The insects and the heat are two things that make camping in Florida terrible. Another part is I've just been lazy.

Camping at the 2001 Rolex 24 at Daytona.
In addition to camping, I've always been a huge fan of automobile racing. In 2001 my wife and I attended and camped at the Rolex 24 Hour endurance race at Daytona. We slept in the back of her Volvo 245 wagon. In 2003 my wife and I attended the Sebring 12 hour race. We tent camped and got rained on.

In 2018 some dear friends of mine came to Florida for the Sebring race. They rented RVs. I had the most fun I've had in a long time. We camped and enjoyed the full 4-day event.

Based on that experience I decided it would be so much fun to be able to camp at more races. Especially here in Florida in the late winter when it's the racing season. And to also camp at the many Florida state parks, National Parks and forests. 

I'm not 20 years old and I can't sleep on the ground anymore. My old bones, arthritis, and sore muscles demand a certain level of comfort. In January I purchased a pop-up trailer, which was only one step up from tent camping. Not many amenities. We took it to Sebring this year and it turned out to be a bit of a disaster. With a 15-year-old, 4-inch foam rubber mattress I woke up feeling like I'd been beaten with a nightstick.  For my wife and I, the pop-up didn't provide any respite from the constant noise of the race track. After three days I felt like the walking dead. We had to leave early which was so disappointing for me.  I never want to experience that again.   

Now I'm super excited to start a new project that will get me back to camping again. And in a way that fits the way I live today.

NEXT POST: Search and Research


6/11/2019

Mule Tracks

Mrs. Howell and I had the pleasure of seeing Warren Haynes and his band Gov't Mule on May 2 at the House of Blues Orlando. 

The music had a magic sound that was like last week while at the same time it transported me right back to the 1970's. To say this band is versatile is an understatement. 

Here's a pretty weak description from Wikipedia When The Allman Brothers Band reformed in 1989, Warren Haynes was added as a permanent lead guitarist and vocalist, and Allen Woody was recruited as bass guitarist. The two shared a love for 1960s power trios like Cream, The Jimi Hendrix Experience, the James Gang, and MountainHaynes, Woody, and drummer Matt Abts, who played with Haynes in Dickey Betts' band, came together as Gov't Mule. They released their debut album Gov't Mule, in 1995.
When The Allman Brothers Band were not forthcoming with any new material, Haynes and Woody left to concentrate full-time on Gov't Mule in 1997. They were joined by members of the Allman Brothers, the Black CrowesParliament/Funkadelic and The Derek Trucks Band for their 1998 New Year's Eve concert. The performances exposed some of the bands' influences, covering Neil YoungFreeTrafficJimi HendrixLittle FeatHumble Pie and Black Sabbath.

I'd say blend The Allman Brothers Band with the Grateful Dead, throw in Pink Floyd, Yes, Muddy Waters, and John Coltrane and you might come close to the band's powerful sound. 

If you're looking for straight ahead rock and roll without all the bullshit theatrics, you must see Gov't Mule.